1: Navigate Your Tree
2: View Information
3: Edit Information
4: Add People to Tree
Show Me, Goal 1
![]() Translation Tips
Music
Translation Tips
Music

![]()
Project 2: MyHeritage Tree
Goal 1: Navigate Your Tree

Goal 1: Navigate your MyHeritage tree.Vault
Navigating your MyHeritage Tree is essential to finding ancestors, viewing and updating their information, and producing charts and reports.
Choices
A Move your screen view to see different ancestors.
Note : The Help window provides more information for many of these features. To access it, click the question mark icon (near the "Find a person" box). To close Help, click the icon again. (To close a personal information window, click the arrow in the upper right of the window.)
Summary- Move the view of your tree.
- Use different zoom levels.
- Use the radar feature to see other areas of your tree.
The default view for your tree is Family View. (Pedigree view is discussed in Choice D below.) Here are some of the essential tools for navigating your tree:
- Moving—Click and drag the mouse (or use the arrow keys) to see other part of your family tree. Or, click the arrows surrounding the House icon to move the view in small amounts. To center the view on the starting person, click the House icon (also helpful if the screen appears to be blank).
- Zoom—Drag the Zoom slider up to zoom in, or down to zoom out. You can also use the mouse wheel to zoom, or click the dots on the slider bar. (At the maximum zoom-out position, names are displayed only when you hover over a person card.)
- Radar—With the personal information window closed, click the Radar icon in the lower left corner of the screen. Then click an area of the Radar view to activate it, or drag the highlighted area in the Radar. This allows you to quickly move to other areas of your tree. To close the Radar view, click the close arrow in the upper right of the icon.
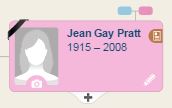
Here is a sample Radar view: - To center a person in the view, click the person's card. (Clicking a person card that is centered will open the person's Edit window.)
- To display the tree in full-screen view, click the four-arrow icon (upper right).
- To quickly find a person in your tree and center that person in the view,
a) in the upper right click "Find a person";
b) Type the name of the person to find; and
c) Select the name from the drop-down list. If you are in Family View, the person is centered in the screen; if you are in Pedigree View (see Choice D below), the person becomes the first person at the left of the pedigree.


Resources
- For information on changing who appears as the Home person in the view, follow the steps in this article.
 MH: How do I change the home person in my online family tree?
- * Good: Move around your tree, center the view, and zoom in and out on several parts of your tree.
- * Proficient: Same as Good; also use the Radar view to move to more distant areas of your tree.
B Use the Options wheel to customize your tree view.
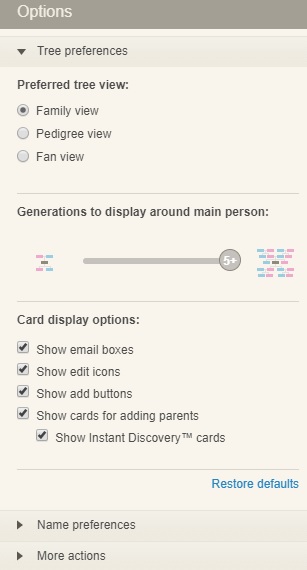
- Click the Options wheel (next to "Find a person") to display tree options. Click it again when you want to close the Options dialog. Here are the settings:
- Tree preferences, Preferred tree view—Choose Family view, Pedigree view, or Fan view.
- Generations to display—Move the slider to change the number of ancestor generations displayed on the screen.
- Card display options—Show or hide: email boxes for living relatives, edit (pencil) icon, Add button, cards for adding parents, and Instant Discovery™ cards.
- Name Preferences, Married names—(scroll down) Choose how to display names of married women.
- Prefixes and suffixes—Choose how to handle name prefixes and suffixes.
- More actions, Edit tree name—Change the name of the family tree. Additional actions include Back up tree, Print chart, Tree privacy settings, Tree editing permissions, and Manage all trees. These are also included in other MyHeritage menus.
- To reset the options to the original settings, for Tree Preferences or Name Preferences, click Restore defaults.
- To close the Options dialog, click the Options wheel icon again.
- * Proficient: Explore each of the items in the Options wheel and make any necessary changes to the settings.
C Open different branches of your family tree to view.
- Find an ancestor with a "branch" icon (small blue and pink rectangles above the person card, connected by lines). Click the icon to open that ancestor's branch. That ancestor is now centered in the view. Note : Opening a branch also closes the branch for the ancestor's spouse.
- When you open an ancestor branch, the person's name appears in the white bar above the family tree (below the main menu bar). You can click any of the names in the bar to center that person in the tree.
- The first number in the white bar is the number of people showing in the current Radar view; the second number is the total number of people in the tree.
You can select certain direct-line ancestors and view their branches of the family tree.
- * Good: Open several different branches of your tree as explained in this Choice.
- * Proficient: Same as Good; also center the view on one of the people, and note the total number of people in your current tree.
D Use Pedigree view.
- In the upper-right, click Pedigree view. Ancestors are now listed in generations from left to right.
- To reset the zoom, in the lower right click the minus or plus icon, or the full-screen icon. To move the view, click and drag.
- For details on the options wheel or full-screen mode, see Choice B above.
- To see additional generations, if available, click a right-arrow (right side of the screen).
- To select a person as the first one in the pedigree view,
a) Click the person's name card;
b) In the Info dialog on the left, click More; and
c) Click View his (her) tree. Or, you can select a name from the "Immediate Family" section in the Info dialog.
- * Good: Open several different branches of your tree in Pedigree view.
- * Proficient: Same as Good; also select a different person to be the first one in the pedigree view.
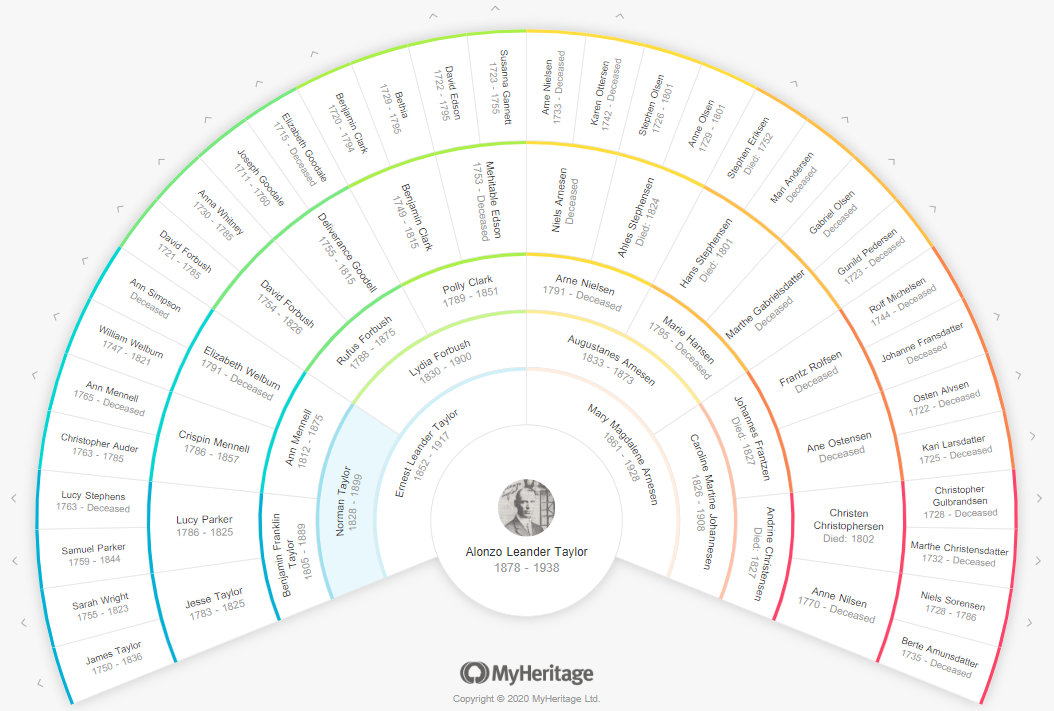
E Use Fan Chart view.
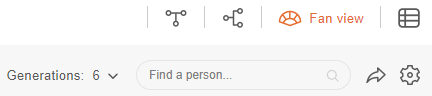
- In the upper-right, click Fan Chart view. Ancestors are now displayed in a fan chart, with a default of six generations. You can drag the view to reposition it.
- To change the number of generations displayed, click Generations (second menu bar) and select a number from 4 to 10. (A higher number of generations will take longer to display.) The second menu bar is shown below.
- To change the display view, use any of the icon options shown at the lower right of the fan chart:
- Plus icon—Zoom in
- Minus icon—Zoom out
- Broken-box icon—Full-screen mode
- Palette icon—Display colors instead of names
- To see additional generations, if available, click any arrow that appears at the edge of the fan chart.
- To select a person as the first one in the fan chart view, hover over the name in the chart and click the small fan chart icon that appears.
- To see details for a person in the fan chart, click the person's name. An information pane opens at the left, with the following items:
- Name and vital information
- "Research this person" (displays record collections for research)
- Profile page button
- Quick Edit button
- Add Relatives button
- More: Additional actions for the person
- To search for a person to display in first position in the fan chart,
a) Click Find a person (second menu bar);
b) Type the person's name; and
c) Select the name from the list. - To change the settings for the fan chart, click the Settings icon (second menu bar). The following options are available:
- Preferred tree view (Family, Pedigree, or Fan)
- Card display options
- Name options
- To share the fan chart on social media, click the arrow icon (second menu bar). Options appear for sharing via Facebook, Twitter, and WhatsApp, as well as copying the link. There is also a download button that creates a .PNG image of the fan chart.
Resources
- For more information on the Fan Chart feature, read this article.
MH: Introducing the Fan View for Family Trees - 2020
- * Good: Open several different branches of your tree in Fan Chart view.
- * Proficient: Same as Good; also select a different person to be the first one in the Fan Chart view.